
A beautiful mound of white fluffy Koji, ready to make sake with
Welcome back to the second part of our beginner’s guide explaining how sake is made. Start here if you haven’t already read Part 1.
We left it last time having just steamed the rice. Now we will deal with what happens with that steamed rice.
Steamed rice is destined to do one of two things; be made into Koji or added to a fermentation (either a fermentation starter or a main fermentation).
Koji Making
You will remember how important Koji is to the production of sake from part 1. Without it, there is no sake.
Why?
Koji rice is crucial in the sake making process because the koji mould it is covered in creates enzymes that convert the complex starch that you find in rice, into simple sugars. This is pivotal as yeast can’t eat starch, but it loves eating sugar. This conversion from starch to sugar is vital as when yeast feeds on sugar, it creates alcohol, aroma, and flavour (all the things we want in sake) through fermentation.
As well as allowing for the conversion of starch to sugar, Koji can create lots of amino acids (proteins) which accounts for Sake’s unique capacity for savoury umami deliciousness.
How?
Still warm steamed rice is taken into the Koji Room (Koji Muro). The Koji Room is a sealed room that is dedicated to the production of koji.
The steamed rice is laid out on a large table and sprinkled with koji spore (koji-kin) to inoculate it with the koji mould. The room is kept warm and humid to encourage the growth of the koji mould on the rice. The rice is periodically mounded together and broken up to increase or disperse temperature and ensure even koji mould coverage on the rice. This is done for between 40-48 hours.
When this process is finished you are left with rice fully inoculated with koji mould, which we now call koji. The rice should have a fluffy covering of sweet chestnut smelling koji mould.


Fermentation Starter (Shubo/Moto)
Nearly all sake produced utilises a fermentation starter, called a shubo or moto.
Why?
The purpose of a fermentation starter is to build up a healthy population of yeast and a certain level of acidity. A healthy yeast population is necessary to be strong enough to ferment the main fermentation. A certain level of acidity is required to protect the fermentation from nasty things getting in there and spoiling the batch. Not many bacteria or other microorganisms can survive in an acidic environment. Luckily for sake brewers, sake yeast is not one of them!
There are 3 commonly used starter methods:
Sukujo (Fast Fermentation Starter)
Kimoto (Traditional Starter Method)
Yamahai (Updated Traditional Starter Method)
All 3 use the same principle for propagating a healthy population of yeast.
Yeast is mixed with steamed rice, koji and water
The temperature is slowly raised over two weeks to allow a steady and controlled increase in the yeast population
The difference between the 3 is how they achieve the required acidity to protect the fermentation.
Sukujo Moto (Fast Fermentation Starter)
Sokujo Moto is the most modern and common method of acidifying a sake fermentation starter. Pure lactic acid is added to the shubo when the ingredients are first mixed to instantly protect it from microbial spoilage. It then takes two weeks to create the required yeast population via the temperature raising protocol we described above.
If a sake doesn’t specifically mention otherwise, it should be assumed that it was produced using a Sokujo Moto.
Kimoto (Traditional Starter Method)
Kimoto is a traditional fermentation starter method that has been used for at least 300 years. Kimoto involves keeping the shubo at a very low temperature (around 5°C) for two weeks while the mixture of steamed rice, koji and water is regularly mixed with long poles.
At this low-temperature lactic acid bacteria from the air that lands on the shubo can survive, with other bacteria not able to survive the cold. Lactic acid bacteria produce lactic acid and allows a natural population to build up in the starter. It takes around two weeks to reach the required acidity to protect the fermentation.
After these two weeks, yeast is added (a small number of producers allow wild yeast to get to work with no yeast addition). The yeast population is then allowed to build up in the same way as with Sukujo Moto, over the course of two weeks.
The mixing with long poles helps to break down the rice and oxygenate the mash, giving the lactic acid bacteria and yeast, a helping hand.
Kimoto fermentation starters take four weeks to complete, an additional two weeks compared to Sukujo moto. Two weeks to first build up the acidity, then two weeks to create the required yeast population.
Yamahai (Updated Traditional Starter Method)
Yamahai is a modern update of the Kimoto method that has been used for around 100 years. The process is similar except that the laborious pole bashing is omitted (the reasons for this will be dealt with in-depth in a later article).
In all three fermentation starter methods, the resulting mash of ingredients looks, smells, and tastes like acidic rice pudding or porridge.

An example of a porridgey shubo with ice cubes in to keep it extremely cold
Sake’s made using Sokujo moto tend to be the cleanest tasting and least acidic.
Sake’s made using Kimoto method tend to be funkier and have a prickly vibrant acidity.
Yamahai tend to be funkier still with gamey and spicy notes.
The Main Fermentation (Moromi)
Once the fermentation is complete, the next step is to start the main fermentation.
Why?
Every step so far has all been leading to this very moment, the time we get to actually make sake. How each step before this was handled and conducted will change what happens in the main fermentation, the fermentation itself is simply the realisation of every element before.
How?
Steamed rice, koji and water are added to the fermentation starter (note the yeast population has been built in the starter so no more yeast is added).
The ingredients are usually added in 3 stages over 4 days.
Stage 1 = 1/6 of total volume added
Stage 2 = Day off
Stage 3 = 2/6 of total volume added
Stage 4 = 3/6 of total volume added
The additions are done this way, so the yeast population has sufficient time to grow and be strong enough to complete the whole fermentation. If all the ingredients for the batch were added at once, the yeast could easily be overwhelmed and not become strong enough to complete fermentation.
This is also why there is a day off on the second day (poetically, as is so often the case in Japanese, referred to as “odori”, meaning to “dance”). This allows the yeast to get to grips with its new environment and start consuming the sugars created by the koji enzymes and grow stronger.
The koji sets about converting starch into sugar, and the yeast sets about eating that sugar and creating aroma’s, flavours, and alcohol.
As with the starter methods, the sake mash during the main fermentation has the appearance and consistency of rice pudding.
As with every step of the sake making process, there are many options and permutations possible, especially in terms of the temperature of the fermentation, which greatly influences the aroma’s, flavours, textures and how long the main fermentation takes.
Lower temperature = more delicate, more aromatic, lower acidity.
Higher temperature = more robust, more flavourful, higher acidity.
A range of 3-5 weeks is common with colder fermentations taking longer than warmer fermentations.
The aroma given off by the fermentation is really quite something. Profuse perfumed banana and pear are common aromas for sake fermentation.
Pressing
Why?
We need to separate the newly created delicious smelling, tasting and alcoholic liquid from the solids (rice, koji, yeast particles) so that we have sake to drink.
How?
Pneumatic Press (Yabuta)
The most common method in Japan is to use a large pneumatic press like the one pictured below. They are most commonly referred to by their manufacturer name of “Yabuta”.
With this method, the sake mash (moromi) is pumped into fine mesh sheets that are separated by balloons that fill up with air. When these balloons inflate, the pressure forces the liquid through the fine mesh, leaving behind the solids.

A “Yabuta” press at Fukuju in Kobe, Japan. Each seam visible is a compartment into which mash is pumped. Air-filled balloons apply pressure to the mash, forcing the liquid away from the solids through the fine mesh, leaving the solids behind
This method is by far the most efficient and the level of control and precision that can be exerted is very exact.
Traditional Box Press (Fune)
Fune’s are a more traditional method of pressing. Fune’s are rectangle boxes into which small fine cotton mesh bags of mash are placed.
Bags are layered into the fune on top of each other. The pressure created by the bags on top of the ones below caused the liquid through the mesh, leaving the solids behind.
Further downward pressure is then usually exerted to press more sake out. Traditionally this was done with counter pressure beam or simply laying heavy rocks on top. Hydraulic pressing mechanisms are common nowadays.

A modern purpose-built fune with a hydraulic press at Urakasumi Brewery in Miyagi Prefecture, Japan

The inside of Melbourne Sake’s DIY fune
Some breweries still use Fune’s for premium products, but it is increasingly rare due to the labour intensity and reduced yield compared to the increasingly precise and well controlled Yabuta’s that produce an incredibly good result.
Drip Pressing (Fukuro Shibori)
This is the oldest and most simple method of pressing.
Sake is put into fine cotton mesh bags and let to drip via only gravity.
As no external force is applied except gravity, this results in the softest and most delicate sake. Almost all high-end competition Dai-ginjo sake uses drip pressing for this reason. Some extremely expensive premium products are drip pressed and only then with a miniscule % of total production of a sake breweries total output.
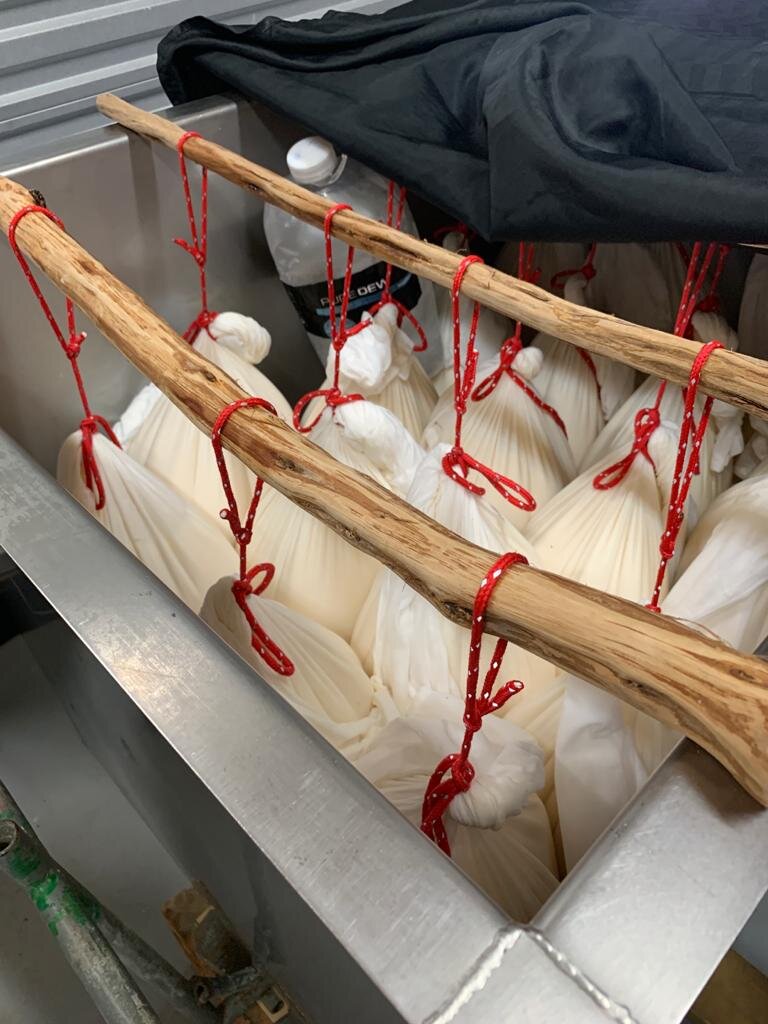
The drip pressing set up at Zenkuro in Queenstown, New Zealand
Post Fermentation Options
Once the liquid sake has been pressed from its solids, we are left with an almost clear liquid. Usually, a very fine sediment remains, rendering the sake cloudy. There are a number of options a sake brewer has with how to handle this freshly pressed cloudy sake;
Removing sediment
Charcoal filtration
Dilution with water
Pasteurisation
Removing Sediment
Most sake available is clear – i.e not cloudy.
To remove the fine sediment left after pressing brewers have two main options
Sedimentation = allowing the sake to rest in a tank so the particles sink to the bottom and then pumping the now much clearer liquid sake off the top. This process is called “racking”.
Very fine Filtration = modern equipment allows for extremely precise and efficient filtration down to a specific micron. Breweries can choose a certain size of filter to achieve a certain level of sediment removal and thus a certain level of clearness.
If the Sake is Left Cloudy: Nigori
If some or all of the sediment is allowed to remain in the sake, leaving it cloudy, this is called a “nigori” sake. Nigori is a traditional style but is becoming increasingly popular in recent years and Melbourne Sake is a big fan of the nigori. We particularly the lightly cloudy examples often termed usu-nigori (usu meaning “thin”).

An example of a nigori sake
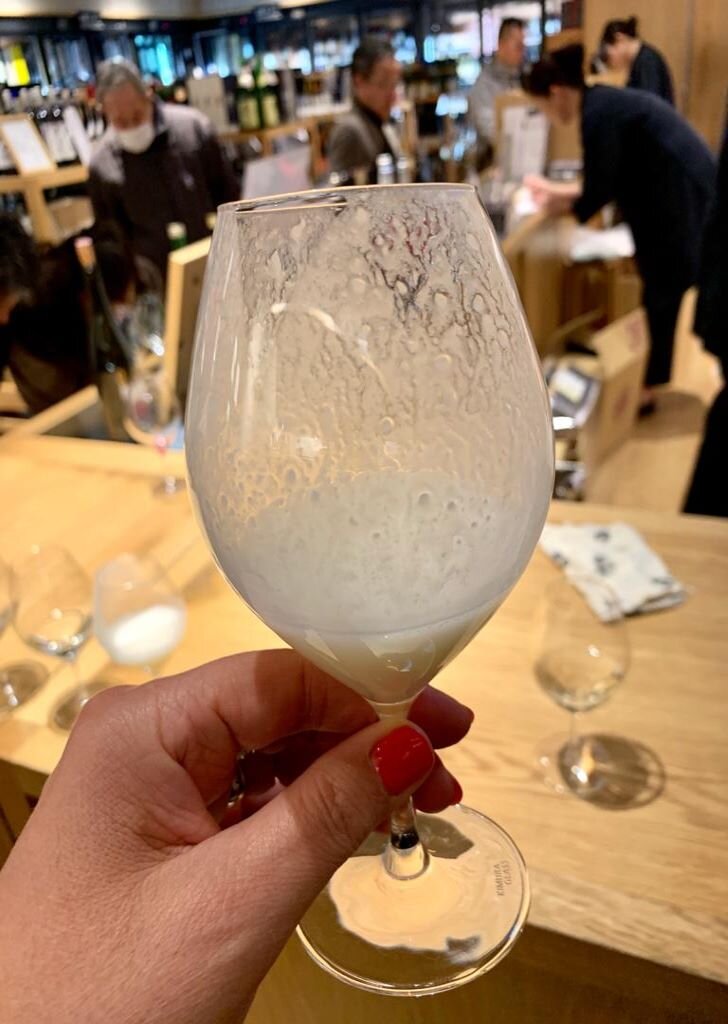
Nigori can range from very lightly cloudy to thick with chunky bits of rice in, like this one
Charcoal filtration
Most sake has been charcoal filtered. Activated charcoal can be used to remove certain elements from the sake, most often colour, but also aroma, flavours, or textural elements the brewer deems undesirable. Different types of charcoal can be used to remove particular elements.
As with any kind of filtration, selectively removing only parts that are deemed negative, without removing potentially positive aspects of the sake, is practically impossible.
Charcoal filtration to remove colour is the option during the sake making process that Melbourne Sake finds most difficult to identify with. Culturally it stems from the perception that the purer the sake is, the better it is. Whilst we respect that position, it is not a position we prescribe too, in either our preferred drinking or making of sake.
If Sake isn’t Charcoal Filtered: Muroka
Muroka is the term given to sake that has not been charcoal filtered in any way. Muroka sake tends to have a characteristic and perfectly natural yellow/amber hue.
Pasteurisation
Most sake on the market has been pasteurised twice. Once just after it has been pressed and once just before it is bottled.
Pasteurisation is nothing new in the world of sake. Centuries before sake breweries understood why the process worked, they were gently heating their sake to improve stability. The process is done very gently, quickly and at a lower temperature compared to other common pasteurisations, such as milk.
This is traditionally done in the bottle in a water bath, but there are modern devices that can expedite the process.

Small scale bottle pasteurisation in a water bath at Melbourne Sake
Pasteurisation was originally done to denature the yeast and koji enzymes that are still active in the sake. Yeast and koji enzymes being still present and active can cause dramatic changes in sake. Eliminating these changes makes for a significantly more shelf-stable product that can be stored and transported with little concern of change.
If Sake Hasn’t Been Pasteurised: Nama
Nama is the term given to sake that hasn’t been pasteurised, nama meaning “fresh” or “raw”.
Unpasteurized sake tends to smell and taste fresher, with a distinctive zip and hard to describe “aliveness” that is absent from pasteurised sake. That is not to say that pasteurised sake is objectively less good, but the differences are often distinctive and pronounced.
Generally, in English speaking countries if sake is being referred to as Nama, it means it has never been pasteurised. There is however potential confusion with this as there are technically three products that contain the word “nama” in their description.
Nama-nama = sake that has never been pasteurised
Nama-chozo = sake that has been pasteurised once, before it is dispatched from the brewery
Nama-zume = sake that has been pasteurised once, straight after production but not again after
Hi-rre = is sake that has been pasteurised twice, straight after production, and again before dispatch from the brewery
Bear in mind these terms in mind if you seek clarification about how nama a nama is.
With modern understanding, technology and cold supply chain, pasteurisation is done less purely for stability, and as much as product differentiation. Most breweries release most products as both pasteurised and unpasteurised versions which can make for a really interesting comparison.
Conventional sake education dictates that sake doesn’t age particularly well and should be drunk fresh. This is touted as never truer than with nama, with claims that all nama sake must be kept refrigerated and drunk as soon as possible repeated ad infinitum.
This may very well be true for lighter, more delicate styles that are made with the intention of quick consumption. They may lose their freshness and spark if left unrefrigerated (although they may develop some interesting characteristics too). Sake’s that are built to last a long time, i.e. sakes that have intense flavours, higher acidity and alcohol can develop in incredibly interesting ways out of the fridge, especially Nama.
Dilution
Most sakes are diluted with water before release. The same water used for brewing is used for this dilution.
Most sake fermentations get up to around 18% alcohol by volume (ABV) with the legal limit in Japan being 22% ABV. A majority of sakes on the market sit around 14-16% ABV.
Just as with whisky, a little dash of water softens the palate and brings out delicate aromas and flavours that would otherwise be obfuscated.
If a Sake isn’t Diluted: Genshu
Gensu refers to sake that has had not been dilution after fermentation. Genshu sakes tend to be much more rich, robust, savoury and higher in alcohol.
Maturation
Aside from some Nama sake that is released extremely quickly as part of its appeal, sake is matured for at least a short time before release. Most sake is rested for a minimum of 6 months to integrate and compose itself. This is similar to even the most basic white wine.
Some sake is matured for much longer before release. Sake that is aged for many years and takes on especially pronounced aged characteristics (nuts, caramel, roasted chestnuts, spices, cooked mushrooms) is often termed “koshu”.
Aside from time, the choice of vessel can lend a difference to finished sake. Stainless steel or coated enamel tanks is the most common, but some are aged in bottle.
Some sake is aged in Kioke, large format Japanese cedar barrels. Sake takes on the flavour of the wood very readily so most sakes are aged this way tend to be aged for a matter of weeks and months, rather than the years in a barrel that some wine or spirits do. Sake that has spent time aging in cedar are termed taru-zake.

A small kioke that can be used for maturation of taru-zake
And finally after all of that you have a bottle of sake in your hands ready to drink! Hurray.
We hope you found this guide to how sake is made illuminating.
As always – any questions, about anything, please get in touch via one of the options below.
Cheers,
Melbourne Sake